Blog
How to Calibrate Your pH Pens for Nutrient Precision
You just spent a significant amount of money on high-quality plant nutrients, your LED lights are dialed in, and your environment is sitting at the perfect temperature. But for some reason, your plants look "off." Maybe the leaves are starting to yellow at the tips, or the growth seems stunted despite you following the feeding schedule to a T.
The fact of the matter is, if your pH pen isn't calibrated, you are essentially flying blind. You might think you’re feeding at a perfect 6.0, but if that pen is off by just 0.5, your plants are actually sitting at 5.5 or 6.5. In the world of high-performance gardening, that small margin is the difference between a record-breaking harvest and a total crop failure.
As we move into the colder months of November, maintaining nutrient precision becomes even more critical. Cold water holds onto gases differently and can affect the sensitivity of your pH probe. Today, we’re going to walk through exactly how to calibrate your pH pens to ensure your hydroponic systems are running with laser-like precision.
Why Precision Matters: The Nutrient Lockout Reality
Before we get into the "how," we need to understand the "why." pH is a measurement of how acidic or alkaline your water is. Most importantly for us, it determines which nutrients are chemically available for the plant to "eat."
When the pH drifts outside of the optimal range, usually 5.8 to 6.2 for hydroponics and coco coir, or 6.0 to 7.0 for soil, certain elements like phosphorus, iron, or magnesium become "locked out." This means the nutrients are physically in the water, but the plant's roots cannot absorb them. You can add all the plant nutrients you want, but if the pH is wrong, you’re just wasting money and stressing your plants.
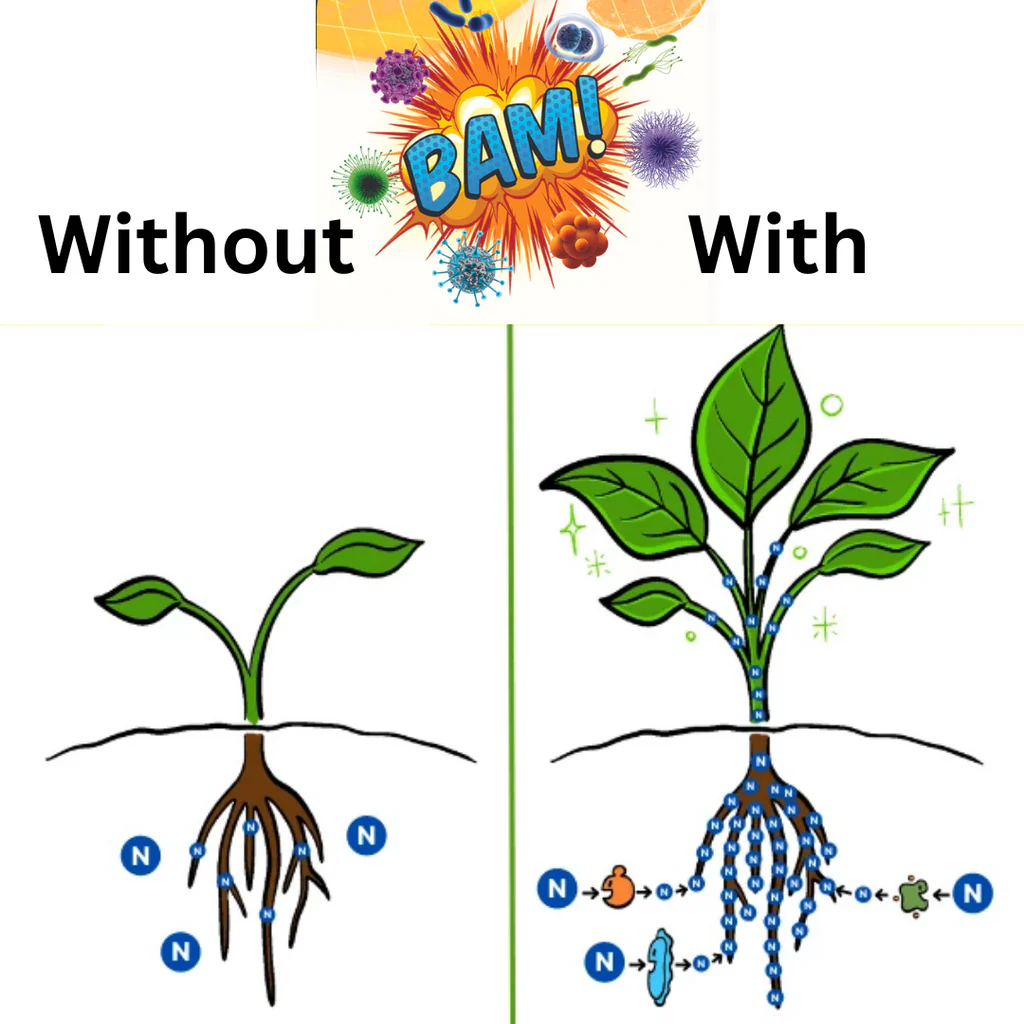
As seen in the comparison above, plants with proper nutrient uptake (right) show vibrant, healthy root systems and lush foliage. Without that precision (left), the roots struggle, leading to weak growth. A calibrated pH pen is the only way to ensure you're on the right side of that image.
Preparation: What You’ll Need
Calibrating a pH pen is a scientific process, not a guessing game. To do it right, you need a few essential supplies:
- Fresh Calibration Buffers: You’ll typically need pH 7.0 (the neutral midpoint) and pH 4.0 (the acidic low-point). If you are growing in a high pH environment, you might use pH 10.0 instead of 4.0.
- Cleaning Solution or Distilled Water: For rinsing the probe between solutions.
- Storage Solution (KCI): Never, ever let your probe dry out.
- Clean Containers: Small jars or shot glasses work great for holding the buffer solutions.
- Your pH Pen: Whether it’s a handheld unit or part of your controllers, the process is largely the same.
Caution: Never dip your pH pen directly into the main bottle of calibration solution. This contaminates the entire bottle. Always pour a small amount into a separate clean container and discard it after use.
Step-by-Step Calibration Guide
Most modern digital pH pens follow a standard two-point or three-point calibration process. While you should always check your specific manufacturer’s manual, here is the industry-standard workflow for maximum precision.
Step 1: Clean and Hydrate
If your pen has been sitting in a drawer or the storage cap is dry, your readings will be sluggish and inaccurate. Soak the probe tip in pH storage solution for at least 30 minutes before starting. If there is salt buildup on the probe, gently rinse it with distilled water.
Step 2: The Mid-Point (pH 7.0)
Turn on your pen and submerge the tip into the pH 7.0 buffer solution. Lightly stir the pen to remove any air bubbles trapped around the glass electrode. Wait for the reading to stabilize. On most digital pens, you will then hold the "CAL" button until the screen flashes or indicates that it has recognized the 7.0 mark.

Step 3: Rinse Thoroughly
This is where many growers mess up. You must rinse the probe with clean tap water or distilled water after the 7.0 buffer. If you take the pen straight from the 7.0 solution into the 4.0 solution, you will contaminate the 4.0 buffer and ruin your calibration accuracy. Shake off the excess water: don't wipe the glass electrode with a paper towel, as static electricity or physical scratches can damage the sensitive membrane.
Step 4: The Low-Point (pH 4.0)
Submerge the rinsed probe into the pH 4.0 buffer. Again, wait for the reading to stabilize. Repeat the calibration button sequence. The pen should now recognize "4.0." This "two-point" calibration creates a "slope" for the pen’s software, allowing it to calculate values accurately across the range you’ll actually be using in your reservoirs.
Step 5: Final Rinse and Storage
Rinse the probe one last time. If you’re ready to test your nutrients, go for it. If not, put a few drops of storage solution into the cap and secure it.
The Importance of Water Quality in Calibration
It’s worth noting that the water you start with matters just as much as the nutrients you add. Many growers struggle with "pH drift," where they set their pH to 6.0, only to find it at 7.0 the next morning. This often happens because of "dirty" water or unstable mineral content in tap water.
Using a product like Drops of Balance can help stabilize your water by removing impurities and adding essential ionic minerals that act as a buffer. When your water is clean and mineral-balanced, your pH pen readings will be more stable, and your calibration will hold longer.

Maintenance: Keeping the Accuracy Alive
A pH pen is a sensitive electronic instrument, not a piece of hardware you can throw around. To keep it accurate between monthly calibrations, follow these rules:
- Monthly Re-calibration: Even the best pens drift. Set a reminder on your phone for the first of every month.
- Check the Slope: High-end pens will show a "Slope %" after calibration. Ideally, this should be between 95% and 103%. If it’s lower than that, your electrode is dying and needs to be replaced.
- Temperature Compensation: Ensure your pen has Automatic Temperature Compensation (ATC). As temperatures drop in November, the actual pH of a liquid changes. An ATC pen adjusts for this so you get a "real" reading regardless of the room temp.
- The "30-Day" Rule: If your pen has a calibration indicator on the screen (like a checkmark), and it disappears, stop what you are doing and re-calibrate. That is the pen telling you it no longer trusts its own sensors.
Where to Measure in Your System
In a complete hydroponic system, the pH can vary slightly depending on where you take the sample.
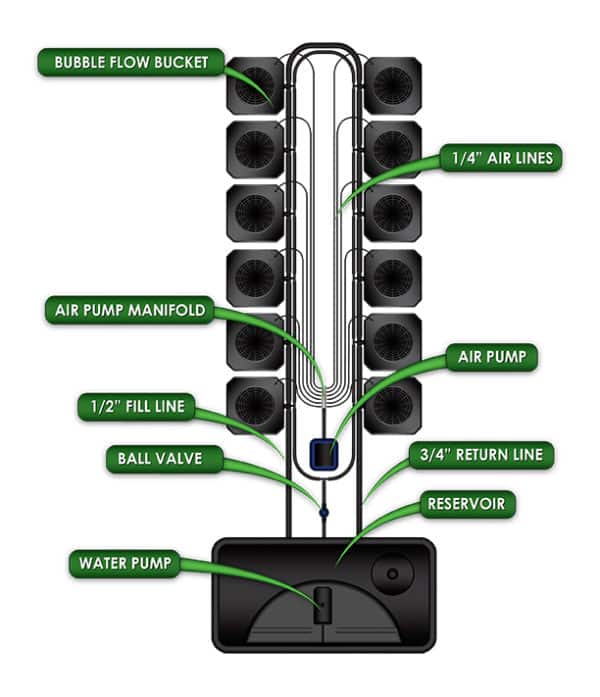
For the most accurate reading, always measure in the main reservoir after the pumps have been running for at least 15-20 minutes. This ensures the nutrients are thoroughly mixed. If you are using a bubble flow system like the one pictured above, avoid taking a reading right next to an air stone, as the localized turbulence and oxygen concentration can cause the digital reading to jump around.
Troubleshooting Common Issues
"My pen is taking forever to settle on a number." This is usually a sign of a dirty or dry electrode. Try soaking it in a dedicated electrode cleaning solution for 15 minutes, then re-hydrating in storage solution for 2 hours.
"I calibrated it, but it still feels wrong." Check the expiration date on your buffer solutions. Calibration fluid only stays accurate for about 3-6 months once opened. If you’re using old fluid to calibrate, you’re essentially "teaching" your pen the wrong information.
"The reading drifts as I move the pen." This is often a sign of electrical interference or a "clogged" reference junction in the probe. Make sure you aren't using the pen near high-voltage ballasts or unshielded LED drivers that might be putting off EMF.
Final Thoughts: The Perfect Routine
Precision is the hallmark of a master gardener. While it might seem like a chore to break out the buffer solutions and little jars every month, the peace of mind is worth it. When you know your pH is exactly 5.8, you can troubleshoot other issues (like pests or light intensity) with the confidence that your nutrient delivery is perfect.
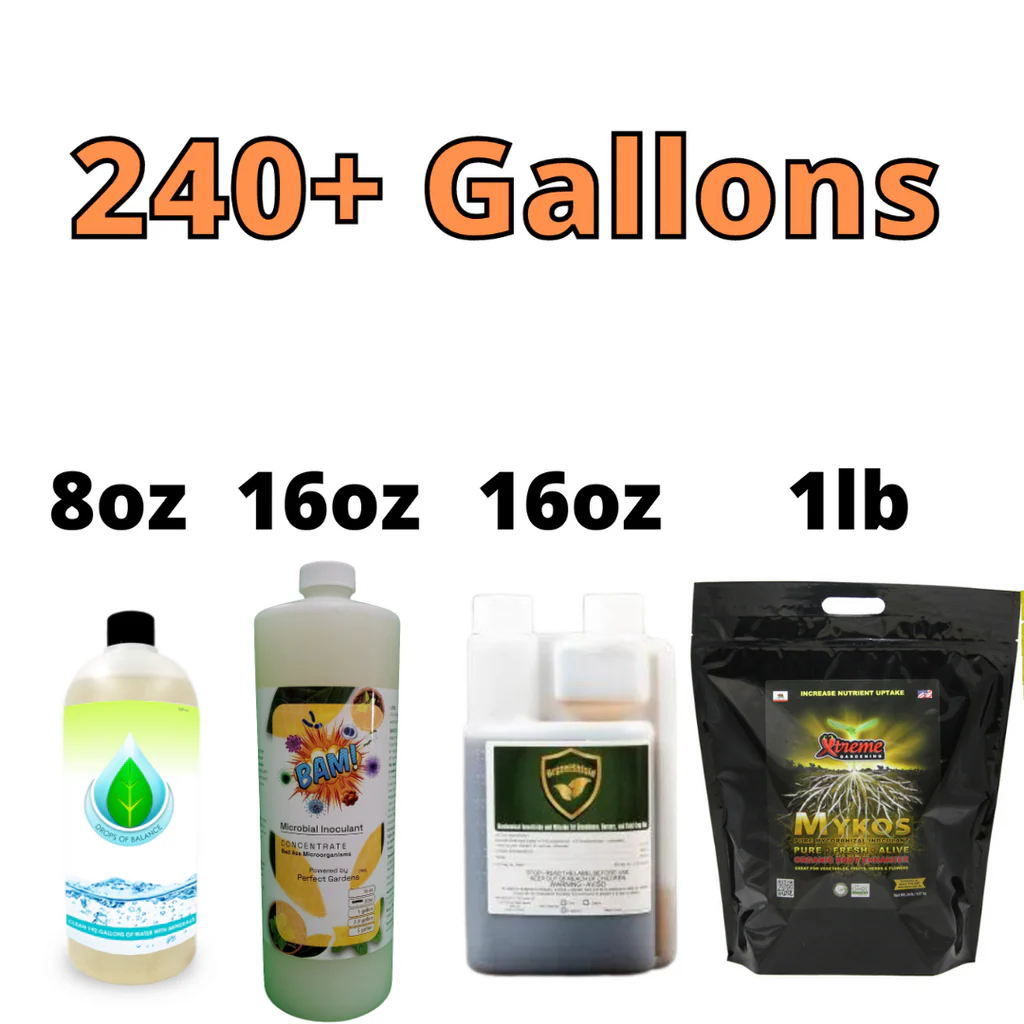
Once your pH is dialed in, you can focus on the fun stuff: like boosting your plants with a Nutrient and Microbial Inoculant Kit. These beneficial microbes thrive in properly balanced environments, working alongside your nutrients to create the heavy, resinous harvests we all strive for.
The fact of the matter is that your grow is only as strong as your weakest link. Don't let a $20 bottle of uncalibrated solution be the reason your garden underperforms this winter. Grab your pen, get some fresh buffers, and dial it in. Your plants will thank you with the best growth you’ve seen all year.