Blog
How to Set Up Your Automatic Watering Stakes in 5 Minutes
Let’s be honest: hand-watering is the ultimate "love-hate" relationship in the garden. It’s therapeutic when you have one or two plants, but when you’re managing a full indoor grow or a dense outdoor tent, it quickly becomes a chore. Worse yet, if you miss a day or mess up your schedule, your plants pay the price.
This is where automatic watering stakes come in. If you’ve been looking for a "set it and forget it" solution that doesn't require complex plumbing or expensive electronic timers, you’ve found it. Systems like the Blumat Classic or Tropf Blumat use the power of physics: specifically osmosis and capillary action: to give your plants exactly what they need, exactly when they need it.
The best part? You can get a basic system up and running in about five minutes. In this guide, we’re going to break down how to set up these stakes so you can stop being a slave to the watering can.
What Are Automatic Watering Stakes?
Before we dive into the setup, it’s important to understand what’s happening under the soil. Most automatic watering stakes, especially the high-quality ones we carry at Perfect Gardens, consist of a ceramic or clay cone attached to a thin piece of tubing.
The science is simple: the ceramic cone is porous. When the soil around the cone dries out, it creates a "suction" (hydrostatic pressure) that pulls water out of the cone and into the soil. As the water leaves the cone, it creates a vacuum that pulls fresh water through the tube from a nearby reservoir.
It is a demand-based system. Your plants literally "call" for water based on how thirsty the soil is. No timers, no electricity, and no overwatering: as long as you set them up correctly.

The 5-Minute Setup: Step-by-Step
While there are advanced systems that can handle hundreds of plants, the "Classic" stake setup is the most popular for hobbyists and home growers. Here is how you do it in five minutes flat.
Step 1: The Pre-Soak (The Secret Ingredient)
Technically, this happens before your 5-minute timer starts, but it’s the most important step. Take your ceramic stakes and submerge them in a bowl of water for at least 15–30 minutes.
Why? You need to saturate the ceramic and ensure there is no air trapped inside the cone. Air is the enemy of an automatic watering stake. If there’s an air bubble inside, the vacuum seal won't form, and the water won't flow.
Step 2: Fill the Cone
Once the stakes have soaked, pull them out of the water. Remove the plastic cap (usually green or black). Fill the ceramic cone to the absolute brim with water. You want it overflowing slightly so there is zero room for air.
Step 3: Snap the Cap on Underwater
To be 100% sure you’ve excluded all air, try to snap the cap back onto the cone while both the cap and the cone are submerged in your soaking bowl. This ensures that the tube and the cone are a continuous "column" of water. Once the cap is tight, you’re ready to plant.
Step 4: Insert Into the Soil
Find a spot near the root zone of your plant. Push the ceramic cone into the soil until the plastic cap is flush with the surface. You want the entire ceramic portion buried so it can interact with the moisture levels of the root zone.
Caution: If your soil is extremely hard or packed, don't just shove the stake in: you might crack the ceramic. Use a pencil or a small tool to pre-dig a pilot hole, then slide the stake in.
Step 5: Drop the Tube in the Reservoir
Take the other end of the thin tubing and drop it into a container of water (a 5-gallon bucket, a pitcher, or a collapsible water storage tank). Make sure the end of the tube stays at the bottom of the reservoir so it doesn't suck air as the water level drops.
Gravity and Positioning: Getting the Flow Right
The "Classic" stakes rely on the height of your water reservoir to determine how much water the plant gets.
- More Water: Place your water reservoir slightly higher than the plant. This adds a bit of gravity pressure, making it easier for the plant to draw water.
- Less Water: Place the reservoir at the same level as the plant or slightly lower.
If you find your soil is staying too wet, lower the reservoir. If it’s too dry, raise it. It’s a low-tech way to "program" your controllers without actually needing electronics.

Using the "Bottle Method" for Smaller Plants
If you don't want tubes running everywhere, many ceramic stakes are designed to fit directly onto a standard plastic water bottle.
- Fill a clean 1L or 2L bottle with water.
- Screw the watering stake onto the mouth of the bottle.
- Quickly flip the bottle over and plunge the stake into the soil.
This is a great solution for houseplants or small herb gardens, but for serious indoor setups or tents, the reservoir-and-tube method is much more reliable because it holds more water.
Why Water Quality Matters
Because these stakes rely on tiny pores in ceramic and very thin tubing, they can be sensitive to "junk" in your water. If you have hard water with high mineral content, those minerals can eventually "calcify" or clog the ceramic, stopping the flow.
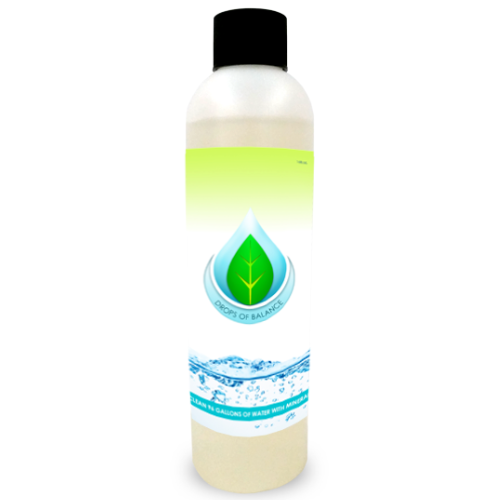
We always recommend using a water optimizer like Drops of Balance. It helps keep the water clean and ensures that the minerals are in a form that won't easily clog your irrigation lines. Plus, it’s great for the plants!
If you are using organic nutrients or compost teas, be careful. Thick, viscous liquids can clog the stakes quickly. We generally recommend running clean, filtered water through the stakes and doing your heavy nutrient feeding by hand, or using a very "clean" mineral-based nutrient line designed for hydroponics.
Blumat vs. Standard Stakes: What’s the Difference?
While "automatic watering stake" is a broad term, the Blumat system is the gold standard.
The Blumat Classic is what we described above: a simple siphon system. However, the Tropf Blumat (Drip Blumat) is a bit more advanced. It has a built-in "valve" that opens and closes based on the pressure inside the cone.
When the soil dries, the valve opens and allows water to drip from a supply line. When the soil is moist, the valve closes. This allows you to connect dozens of plants to a single large storage tank and run a professional-grade irrigation setup with zero electricity.
If you’re growing in fabric raised beds or large pots, the Tropf system is usually the better investment because it offers more precision.

Common Pitfalls and How to Avoid Them
Even though the setup is fast, there are a few things that can trip up even experienced growers:
- The "Runaway" Siphon: If your reservoir is way too high above your plants, gravity might take over completely and cause the stake to drip constantly, flooding your pot. Keep the reservoir no more than 12 inches above the soil line for Classic stakes.
- Air Bubbles: If you notice a stake has stopped working, it’s almost always an air bubble. Pull it out, re-soak it, and re-install it.
- Empty Reservoirs: It sounds obvious, but if your reservoir runs dry, the system will suck in air. You’ll have to re-prime (soak) the stakes all over again once you refill the bucket.
- Algae Growth: If your water reservoir is clear and sits in the light, algae will grow. This algae will eventually clog your tubes. Use an opaque container like a black bucket or a Grow1 tank to keep things dark and clean.
Maximizing Your Results
To get the most out of your automatic watering stakes, consider the environment of your grow. If you are using high-intensity LED lights, your plants will drink significantly more water than they would under lower light.
During the peak of the flowering stage, a large plant can easily drink a gallon of water a day. Make sure your reservoir is sized appropriately so you aren't refilling it every 24 hours: that defeats the purpose of "automatic" watering!
Final Thoughts
Automatic watering stakes are a game-changer for the hobbyist grower. They bridge the gap between "I hope I remembered to water" and "I have a $5,000 fully automated irrigation system."
By spending five minutes today to soak your cones and set up a reservoir, you’re giving your plants a consistent, stress-free water supply. Consistent moisture means consistent growth, and consistent growth means better yields.
Ready to automate your garden? Check out our full range of irrigation and hydroponic supplies to find the perfect fit for your setup. Whether you need a simple stake for a single pot or a full Blumat array for a commercial tent, we’ve got you covered. Happy growing!