Blog
Mastering the Cure: How to Preserve Terpenes and Potency
You’ve spent months hovering over your plants, checking trichomes, and obsessing over nutrient PPMs. You’ve finally harvested, and the finish line is in sight. But here is the truth: if you mess up the cure, you might as well have grown ditch weed. The curing process is where the "magic" happens: it’s the difference between a harsh, hay-smelling smoke and a smooth, flavorful experience that truly showcases the genetics you worked so hard to grow.
At Perfect Gardens, we see a lot of growers treat curing as an afterthought. They think once the buds are dry, the job is done. This is not the case. Curing is a biological and chemical transition that preserves terpenes and maximizes potency. If you want top-shelf results, you have to master the cure.
Why Curing is Non-Negotiable
When you harvest your plants, they aren’t "dead" immediately. The cells are still metabolic for a short period, and enzymes are still working. Curing allows for the controlled breakdown of chlorophyll. Chlorophyll is essential for life, but it tastes terrible when smoked: it’s responsible for that "fresh-cut grass" or hay smell and the throat-burning harshness of uncured flower.
Beyond flavor, curing is about terpene preservation. Terpenes are volatile aromatic compounds. They evaporate at relatively low temperatures. If you dry your buds too fast or store them in a way that allows them to "off-gas" continuously, those flavors and smells are gone forever. Proper curing locks them in.
Lastly, there’s potency. While the plant stops producing THC once it’s cut, the curing process helps stabilize the cannabinoids. Improper storage: specifically exposure to light and heat: will cause THC to degrade into CBN, which is much more sedative and less psychoactive than most growers want for their primary harvest.
The First Step: The Transition from Drying to Curing
You can't have a good cure without a good dry. We’ve covered drying and curing best practices before, but the key takeaway is that you should never rush the process.
Once your branches "snap" instead of bend, or the outside of the buds feels slightly crispy but the stems still have a bit of give, it’s time to move them into containers. If you wait until the stems are brittle and the buds crumble to dust, you’ve over-dried them, and the curing process won't really start because there’s no moisture left to move around.

Choosing the Right Containers
The gold standard for home growers remains the wide-mouth glass Mason jar. Glass is non-reactive, airtight, and easy to clean. Plastic bags or cheap Tupperware can leach chemicals or "static" off the trichomes, which is why we generally advise against them for long-term curing.
- Glass Jars: Best for small to medium harvests. They allow you to see the product without opening the lid.
- Specialized Curing Buckets: For larger harvests, food-grade buckets with Gamma seals work well, but you have to be even more diligent about monitoring.
- CVaults or Stainless Steel: These are great because they block 100% of light, which is one of the biggest enemies of potency.
If you are using glass jars, remember that light is the enemy. Keep your jars in a dark closet or a Gorilla Grow Tent that isn't currently in use.
The Golden Rules of the Curing Environment
If you want to master the cure, you need to manage the "Big Three": Temperature, Humidity, and Light.
1. Temperature Control
Terpenes begin to degrade at temperatures as low as 70°F (21°C). Ideally, you want your curing area to be between 60-70°F. If the room is too hot, the lighter, floral terpenes will evaporate, leaving you with a duller profile. If it’s too cold, the moisture won't move out of the center of the bud effectively, increasing the risk of "jar rot" or mold.
2. Relative Humidity (RH)
This is the most critical metric. You want the internal humidity of your jars to sit between 55% and 65%.
- Above 65%: You are in the danger zone for mold and mildew.
- Below 55%: The curing process effectively stops. The enzymes that break down chlorophyll stop working, and the buds become brittle.
3. Light Exposure
UV light breaks down THC. It’s that simple. If you leave your glass jars on a windowsill, you are actively killing your potency. Always store your curing containers in a pitch-black environment.
The "Burping" Process: A Step-by-Step Guide
Burping is the act of opening your jars to exchange the air. During the first few weeks, the moisture from the center of the bud migrates to the outside. Burping releases that moisture and brings in fresh oxygen.
- Week 1: Open your jars 2–3 times a day for about 5–10 minutes. Gently shake or rotate the jars to make sure the buds aren't sticking together. If you smell ammonia, it means your buds are too wet and anaerobic bacteria are forming: get them out of the jar and dry them on a rack for a few hours immediately.
- Week 2: Burp once a day. At this point, the "hay" smell should be fading, and the actual aroma of the strain should be coming forward.
- Week 3 and Beyond: If your humidity is stable at 60-62%, you can drop down to burping once a week.

Using Humidity Packs and Monitoring Tools
The fact of the matter is that most of us have lives and can’t sit around staring at jars all day. This is where technology helps. We highly recommend using small digital hygrometers inside your jars. They are cheap and give you an instant readout of the RH.
If you find your humidity is fluctuating too much, use a 2-way humidity pack like a Boveda 62%. These packs are amazing because they don't just add moisture; they can also absorb excess moisture to keep the environment perfectly balanced.
Efficiency for Larger Harvests
If you’re dealing with a large volume of flower, hand-trimming everything and managing fifty small jars is a nightmare. This is where tools like the Trim Bag come into play. You can dry-trim your flower efficiently and then move into larger curing containers.

Using a Trim Bag allows you to process the harvest quickly so you can get the buds into a controlled environment before they over-dry. The longer the flower sits out in the open air of a room, the more terpenes you lose.
The Role of Water Quality in Final Flavor
It sounds strange to talk about water quality when discussing curing, but the two are linked. If your plants are loaded with heavy metals or salts from poor-quality water during the growing phase, no amount of curing will make them taste "clean."
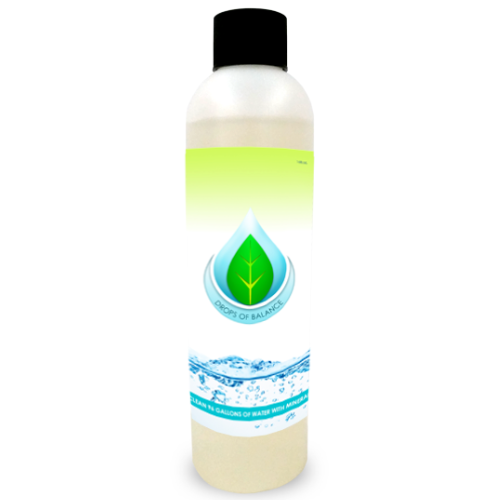
We recommend using products like Drops of Balance during the grow cycle. This ensures the plant is processing nutrients cleanly, which leads to a much smoother chemical breakdown during the cure.
Common Curing Pitfalls (And How to Avoid Them)
1. The Ammonia Smell
If you open a jar and it smells like cat pee or ammonia (and it's not a "Cat Piss" strain), you have mold starting. This happens when buds are jarred too wet.
- Fix: Spread them out on a drying rack in a dark room with good airflow for 12-24 hours, then try again.
2. Over-Drying
If your RH drops below 50%, the cure is over. You can try to "rehydrate" with a humidity pack, but the biological breakdown of chlorophyll has likely stopped and won't restart.
- Fix: Be proactive. Use hygrometers from day one.
3. Packing Jars Too Tight
If you crush the buds into the jar, there's no airflow. This leads to uneven curing and increases the risk of mold in the center of the jar.
- Fix: Fill jars about 75% full. Leave enough room so that when you shake the jar, the buds can actually move.

Final Thoughts from Mark
Curing is the final victory lap of your grow. It takes patience, which I know is hard when you really want to try your harvest. But if you put in the effort to keep your temps low, your humidity at 62%, and your jars in the dark, you’ll be rewarded with a product that rivals anything you can buy in a dispensary.
If you’re looking to upgrade your post-harvest setup, whether it’s better indoor gardening automation or just getting your nutrient game on point with a microbial inoculant kit, we’ve got you covered.
Don't rush the process. Your terpenes will thank you.