Blog
Maximizing Yield with KIND LED: A Comprehensive Setup Guide
When it comes to indoor gardening, your lighting system is the engine that drives your entire operation. If you want to maximize yield, you cannot simply "hang a light and hope for the best." In the world of high-end horticulture, KIND LED has established itself as a leader for a reason: they provide the specific spectrums and intensities required to push plants to their genetic limits.
Setting up a high-performance indoor gardening setup requires more than just plugging things into a wall. It requires an understanding of light height, spectrum adjustment, and how to acclimate your plants to professional-grade intensity. In this guide, we’ll walk through the technical setup and optimization strategies for KIND LED grow lights to ensure your 2027 harvests are the heaviest yet.
Why KIND LED for Maximum Yield?
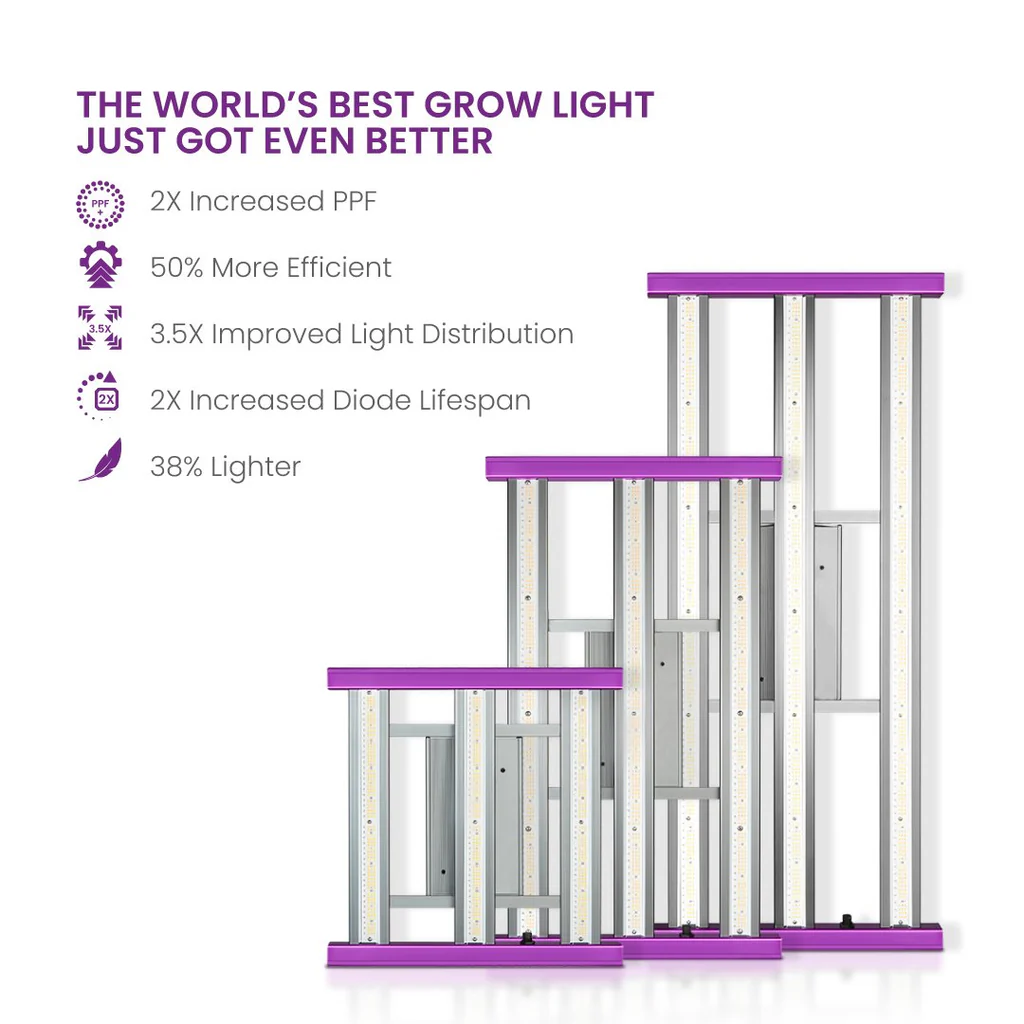
The jump from generic LEDs to KIND LED technology is significant. Traditional grow lights often provide a "blurple" or fixed white spectrum that treats all growth stages the same. KIND LED systems, particularly the K5 and X-Series, offer 2X increased PPF (Photosynthetic Photon Flux) and 50% higher efficiency compared to older generations.
The fact of the matter is that yield is directly tied to how much usable light (PAR) reaches the lower canopy, not just the top leaves. KIND utilizes re-calibrated secondary optical lenses that deliver 200% greater canopy penetration. This means the "popcorn buds" at the bottom of your plant receive enough energy to develop into dense, high-quality flowers, significantly increasing your overall harvest weight.
Step-by-Step: Initial Assembly and Installation
Before you can start blasting your plants with light, you need a secure physical setup. Many growers rush this and end up with uneven hanging or, worse, a light that falls onto their canopy.
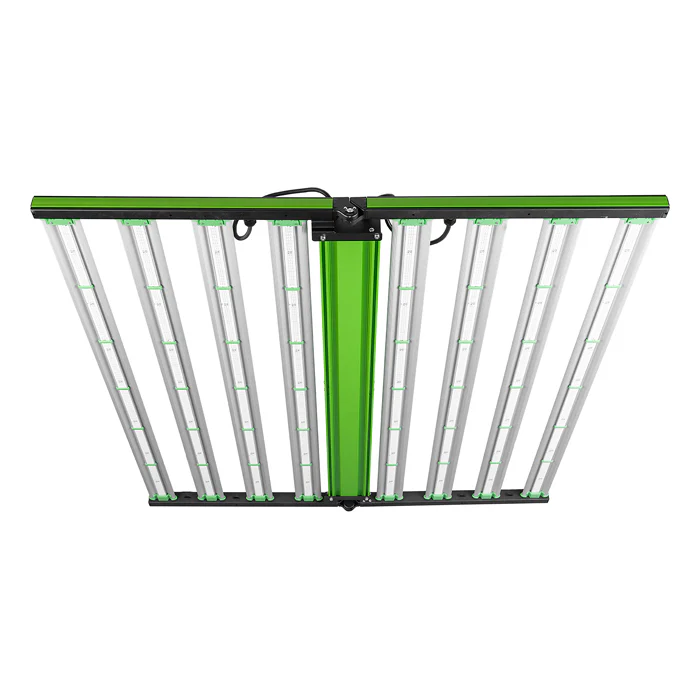
1. Unfolding and Rail Attachment
For X-Series models, begin by unfolding the light bars on a clean, flat surface. Locate the four screw holes for the driver rails. It is important to place the rails with the raised edges facing outward over the light bars. This ensures proper heat dissipation and structural integrity.
2. Securing the Driver
Use the provided flat-head screws to attach the rails, ensuring they are hand-tight. Position the driver box on the rails with the power connectors facing the connectors on the light bars. Secure the driver box using pan-head screws. This configuration keeps the weight centered, making the fixture easier to hang level.
3. Connection and Testing
Connect the power cables between the driver and the light bars. Always perform a "dry run" test outside of your grow tent to ensure all bars illuminate correctly before you commit to the final hang.
The Critical Importance of Acclimation
One of the most common mistakes beginners make with high-intensity grow lights is "light shock." When you move a plant from a lower-intensity environment (like a T5 fluorescent or a windowsill) into a KIND LED environment, the sudden surge in photon energy can cause the plant to shut down or bleach.
The 48-Inch Rule:
For the first 3 to 7 days of introducing plants to your KIND LED setup, position the fixture at least 48 inches above the canopy. This allows the plants to slowly ramp up their metabolic processes. If the plants show no signs of stress (leaf curling or tip burn), you can begin lowering the light to its optimal working height.
Mastering Light Distance and Positioning
Once your plants are acclimated, your goal is to maintain the "sweet spot." Moving the light further away increases the coverage area but decreases the intensity. Conversely, moving it too close can lead to heat stress or light toxicity.
| Growth Stage | Recommended Distance from Canopy |
|---|---|
| Germination | 24 - 36 inches |
| Seedling | 18 - 24 inches |
| Vegetative | 12 - 18 inches |
| Flowering | 12 - 18 inches (Monitor closely) |
Caution: While the vegetative stage can handle 12 inches in some setups, we generally recommend a minimum distance of 24 inches for newer growers using high-wattage K5 or X-Series models until you are intimately familiar with how your specific strain reacts to the intensity.
Spectrum Optimization: Blue vs. Red
One of the standout features of KIND LED is the ability to adjust the spectrum. Plants don’t need the same light in June that they do in October. By mimicking the seasons, you signal to the plant exactly what it should be doing with its energy.
- Vegetative Stage (The "Spring" Spectrum): During this phase, you want to increase the Blue spectrum (400-500nm). Blue light promotes thick stems and short internodal spacing. This creates a squat, bushy plant that can support heavy weight later on.
- Flowering Stage (The "Autumn" Spectrum): As you transition to flower, shift the spectrum toward Red (600-700nm). Red light mimics the late-summer sun, triggering the production of hormones that enhance flowering and fruiting.
- The Secret Weapon (UV/IR): Advanced KIND models include UV diodes. UV light stresses the plant in a "good" way, forcing it to produce more trichomes and terpenes as a natural defense mechanism. This doesn't just increase yield weight; it increases the quality and potency of the harvest.

Timing and Automation
The KIND LED K5 Series often comes with a preconfigured 8-stage timing cycle. This is designed to satisfy vegetative requirements with 18 hours of light at varying intensities to mimic sunrise and sunset.
Using the remote control or the WiFi Command Center, you can customize these cycles. Mimicking a natural sunrise (slowly ramping up intensity over 30 minutes) prevents the plant from being "shocked" into activity every morning, which can lead to more stable growth patterns.
Supporting High-Intensity Light with Nutrition
Here is the "Perfect Gardens" secret: When you maximize your light intensity with a KIND LED, your plants’ metabolism goes into overdrive. They will "eat" faster and "breathe" faster. If you don't adjust your nutrient and microbial regimen to match, the light will actually work against you by causing nutrient deficiencies.
To support the massive growth triggered by these grow lights, we highly recommend integrating beneficial microbes. A robust root system is the only way a plant can keep up with the demands of a high-PAR environment.
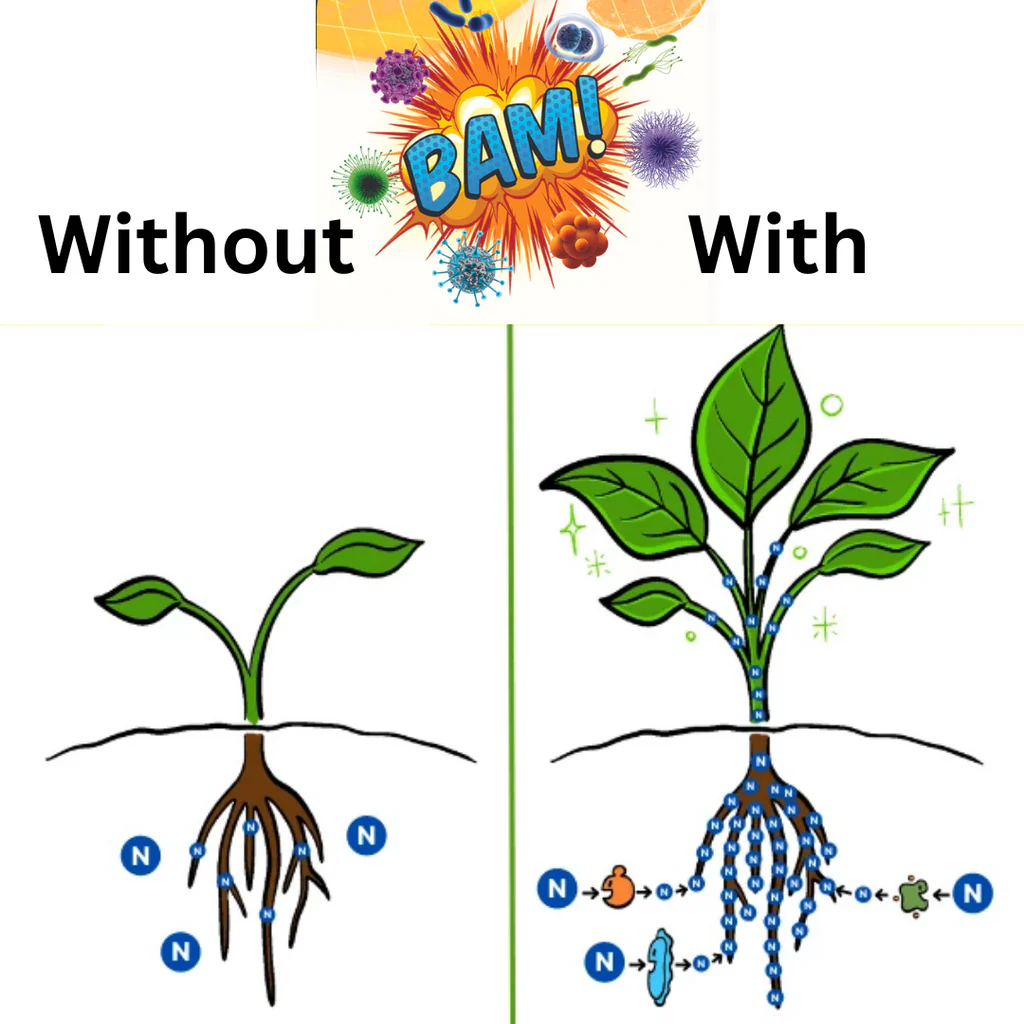
Using products like Teraganix or a full Microbial Inoculant Kit ensures that your root zone can process nutrients fast enough to sustain the explosive growth occurring above the soil. Mycorrhizae and beneficial bacteria create a symbiotic relationship that expands the reach of your roots, allowing for maximum uptake of minerals and water.
Common Pitfalls to Avoid
- Ignoring the Heat: Even though LEDs are more efficient than HPS, they still generate heat. Ensure your ventilation system is dialed in to handle the micro-climate created under the light bars.
- Over-Watering: Because LEDs emit less infrared heat than traditional bulbs, the surface of your soil may stay wet longer. Do not water on a schedule; water based on the weight of the pot or the moisture level an inch below the surface.
- Set and Forget: Plants grow fast under KIND LEDs. If you don't check your light height every 2-3 days, your plants can grow right into the diodes, leading to permanent light burn on your main colas.
Final Thoughts on Your 2027 Setup
Maximizing yield is a game of balance. The KIND LED provides the power and the precision, but it is up to you to manage the environment. By starting with the correct assembly, respecting the acclimation period, and adjusting your spectrum to match the plant's life cycle, you are setting the stage for a record-breaking harvest.
Remember, a high-performance light is only as good as the foundation it sits on. Ensure your hydroponic system or soil setup is primed with the right microbes and nutrients to handle the increased energy. If you’re ready to upgrade your grow, check out our full selection of LED lights and let’s make 2027 your most productive year yet.