Blog
Post-Harvest Sanitation: Resetting Your Grow Room for Success
You’ve just crossed the finish line. The harvest is drying, the jars are waiting, and you’re probably looking forward to a well-deserved break. But before you pop a bottle or kick back, there is one critical phase of the grow cycle that many gardeners rush through or: even worse: skip entirely: the reset.
The period between your last harvest and your next set of clones or seeds is the most important time for your facility or home grow. This is your only opportunity to eliminate the "bio-burden" left behind. Pests, mold spores, and salt build-up don't just disappear because the plants are gone; they hibernate, waiting for the next warm, humid environment to wake up and ruin your next run.
At Perfect Gardens, we’ve seen it all. We’ve seen entire crops lost to powdery mildew because a grower didn't wipe down the top of their LED drivers. We’ve seen spider mite infestations recur three cycles in a row because they were hiding in the folds of the grow tent.
The fact of the matter is that a clean room is a high-yielding room. Here is your step-by-step guide to resetting your grow space for success.
Phase 1: The Great Clearance
The very first thing you need to do is get everything organic out of the room. This includes the obvious stuff like the main stalks and root balls, but it also includes the tiny debris.
- Remove All Plant Matter: Even a few dried leaves in the corner can harbor botrytis (bud rot) spores. Use a Shop-Vac with a HEPA filter to get into every crevice.
- Dispose of Waste Properly: Don't leave your trim or waste sitting in a trash can inside the grow area. Take it outside immediately.
- Inspect Your Substrate: If you are using soil or coco and you don't plan on amending and reusing it (which we generally caution against unless you are an expert in soil biology), get those pots out of the room.
Phase 2: Sterilizing the Infrastructure
Once the room is empty, it’s time to address the surfaces. Your walls, floors, and ceilings are prime real estate for pathogens. If you are using Black & White Panda Film, check for any tears or pockets where moisture could have trapped mold.
The Power of Hydrogen Peroxide
For deep cleaning, we highly recommend a high-quality sterilizer. While many people use a 10% bleach solution, it can be corrosive and leave a nasty residue. A better alternative for many hydroponic enthusiasts is food-grade hydrogen peroxide.

Using something like Pyur Scientific 35% Hydrogen Peroxide is incredibly effective. It breaks down into water and oxygen, leaving no toxic residue behind. You’ll want to dilute this heavily for surface cleaning, but it is powerful enough to kill almost any lingering spore or bacteria on contact.
Caution: When working with 35% H2O2, always wear gloves and eye protection. It is highly concentrated and can cause skin burns if handled improperly.
Phase 3: Equipment Deep Clean
This is the part most growers dread, but it’s where the "pros" separate themselves from the amateurs.
1. Scrub Your Pots and Reservoirs
If you are using plastic pots or fabric pots, they need a deep soak. Fabric pots can often be run through a washing machine with a bit of peroxide or specialized cleaner. For plastic pots and reservoirs, scrub away the salt lines. Those white crusty deposits are mineral buildups that can fluctuate your pH in the next run.
2. Flush the Hydroponic Lines
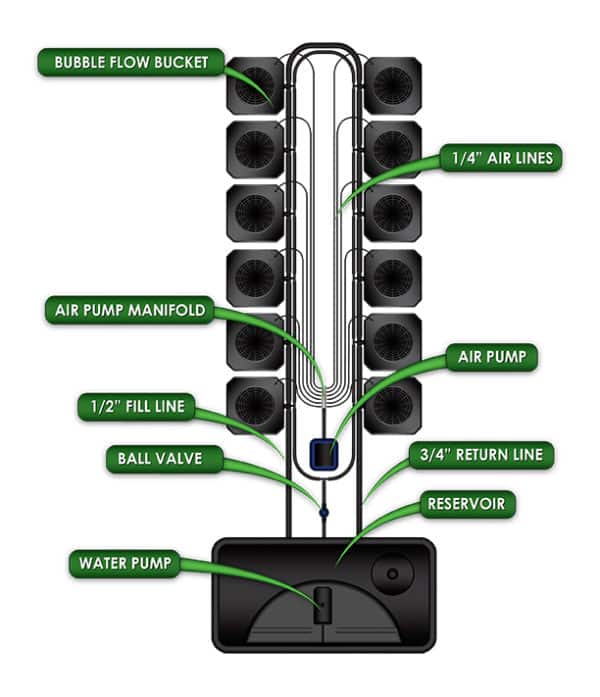
If you are running an automated system, like a Hydroponic Bubble Flow Bucket System, your lines are likely filled with a "biofilm": a slimy layer of bacteria and nutrient residue.
Run a strong cleaning solution through the pumps and lines for at least 24 hours. After the cleaning cycle, flush the system multiple times with plain water. To help break down those stubborn mineral deposits during the transition, many growers use a nutrient rinse.

Products like FoxFarm Bushdoctor SledgeHammer are designed to clear out excess salts. While often used for a pre-harvest flush, it’s also a great tool for cleaning out your media or system components before a new cycle starts to ensure a "blank slate."
Phase 4: Light and Air Maintenance
Your equipment needs physical maintenance just as much as chemical sanitation.
- LED Lights: Dust acts as an insulator. If your LED lights have a layer of dust on the heat sinks, they will run hotter, which shortens their lifespan and increases your room temperature. Wipe the diodes gently with a dry microfiber cloth or a bit of isopropyl alcohol (if the manufacturer allows it).
- Fans and Ventilation: Take your oscillating fans apart. You’ll be shocked at how much dust and "plant hair" builds up on the blades. Clean blades move air more efficiently and are quieter.
- Carbon Filters: If you’ve finished a particularly smelly run, check your pre-filter (the cloth sleeve around the carbon filter). If it's yellow or brown, wash it or replace it. If your carbon filter is over a year old, it might be time for a replacement to ensure total odor control for the next run.

Phase 5: Re-Mineralization and Water Prep
Once the room is scrubbed from top to bottom and the equipment is back in place, you need to think about your water source. During the cleaning process, you’ve likely stripped the environment of everything. When you start your next batch of seedlings or clones, they need the purest environment possible.
If you’re dealing with tap water or inconsistent water quality, consider using a mineral concentrate to "reset" your water's baseline. Drops of Balance is a great way to ensure your water is purified and mineralized correctly before you even add your primary nutrients.
Phase 6: The "Pre-Flight" Check
Before you bring a single plant back into the room, do a dry run.
- Check for Leaks: Run your irrigation for 10 minutes to see if any seals dried out and cracked while the room was empty.
- Calibrate Your Sensors: Your pH and EC pens have likely drifted. This is the time to calibrate them using storage and calibration solutions.
- Monitor the Environment: Turn on your lights and AC. Let the room run for 24 hours empty. Check your hygrometer to ensure the humidity and temperature are stable. If you can't control the environment in an empty room, you definitely won't be able to do it once it’s full of transpiring plants.
Common Misconceptions About Cleaning
- "I don't have bugs, so I don't need to deep clean." This is the most dangerous mindset. Pests like Root Aphids or Spider Mites can be present in such small numbers that you don't see them until the population explodes mid-way through your next flower cycle.
- "Vinegar is just as good as Peroxide." Vinegar is great for descaling calcium, but it isn't a registered disinfectant that can kill heavy-duty fungal spores. Use the right tool for the job.
- "The cold will kill the pests." If you're a seasonal grower, don't assume a cold winter in the garage killed the bugs. Many pests go into a state of diapause (basically hibernation) and will wake up the moment your grow lights provide warmth.
Resetting for the Win
It seems more like a chore than a hobby when you’re scrubbing floors on a Saturday, but the peace of mind is worth it. When you start your next cycle in a sterile, organized, and calibrated room, you are setting yourself up for a maximum yield with minimum stress.
If you are unsure about which cleaning products are safe for your specific hydroponic setup, or if you need help troubleshooting a recurring pest issue that survived your last cleaning, check out our Grow Help Videos for more visual walkthroughs.
The reset is about more than just hygiene; it’s about a fresh start. Take the time to do it right, and your plants will thank you in a few months.
Need a hand getting your gear ready? You can always reach out to us with questions about equipment compatibility or the best ways to sanitize your specific tent setup. Happy growing!