Blog
The Deep Clean: Sterilizing Your Setup Between Cycles
Every veteran grower knows that the window between one harvest and the next "flip" is the most critical time for the health of your future plants. While the temptation to immediately drop new seeds or clones is high, skipping a deep sterilization phase is one of the fastest ways to invite disaster. Pathogens like powdery mildew, pythium (root rot), and pests like spider mites or fungus gnats don't just disappear when you chop your plants: they linger in the cracks, the lines, and the fabric of your grow space.
The fact of the matter is that a clean grow room is the foundation of a high-yield garden. If you want to maximize the potential of your LED lights and premium nutrients, you must provide a sterile environment. This guide will walk you through the technical process of breaking down your room and using the right chemical agents to ensure your next cycle starts with a clean slate.
Phase 1: The Full Breakdown and De-clutter
Before you reach for the scrub brush, you need to clear the field. A "deep clean" cannot happen while there is still organic matter or equipment cluttering the floor.
- Remove All Plant Waste: Sweep up every dried leaf, bit of spilled medium, and stray root. Organic decay is a breeding ground for pathogens.
- Clear the Floor: Remove every pot, tray, and reservoir. If you are using tents, take everything out until you are looking at the bare floor liner.
- Inspect Your Components: As you remove items, check for signs of salt buildup or algae. This helps you identify which parts of your system need the most attention.
Phase 2: Choosing Your Sterilization Arsenal
Not all cleaning agents are created equal. Depending on whether you are dealing with mineral scale, algae, or fungal spores, you’ll need specific tools.
1. 35% Food Grade Hydrogen Peroxide (H2O2)
This is arguably the most essential tool for a hydroponic grower. Unlike store-bought 3% peroxide, 35% food-grade H2O2 is highly concentrated and effective at oxidizing organic matter and killing pathogens on contact. When diluted, it breaks down into water and oxygen, leaving no toxic residue.

- Usage: Excellent for "shocking" reservoirs and cleaning irrigation lines.
- Caution: At this concentration, it is extremely caustic. Always wear gloves and eye protection.
2. Bleach (Sodium Hypochlorite)
Bleach is the "nuclear option" for killing stubborn spores and viruses. It is cheap and effective, but it requires thorough rinsing because the residual chlorine can be toxic to young plants.
- Ratio: A standard 1:10 bleach-to-water ratio is sufficient for most surfaces.
- Contact Time: For bleach to be truly effective, it needs to stay wet on the surface for at least 5 to 10 minutes.
3. Isopropyl Alcohol (70% - 90%)
Best used for cleaning sensitive electronics, light reflectors, and hand tools. 70% ISO is actually more effective at killing bacteria than 99% because the higher water content allows it to penetrate the cell walls of the organisms more efficiently before evaporating.
4. Mineral Descalers
If you have hard water, you likely have calcium and magnesium buildup in your pumps and lines. Products like "Drops of Balance" can help manage mineral content during the grow, but for between-cycle cleaning, a mild acid (like citric acid or vinegar) is often needed to dissolve "salt crust."

Phase 3: Scrubbing the Grow Tent and Room
The walls of your grow room are massive surface areas that collect dust and spores. If you are using black and white panda film, you need to be careful not to use abrasive scrubbers that could tear the material.
- Vacuum First: Use a shop-vac with a HEPA filter to get dust out of the corners, zippers, and intake vents.
- The Top-Down Method: Always clean from the ceiling down to the floor. Use a mop or microfiber cloth soaked in a diluted H2O2 or bleach solution.
- Zippers and Seams: These are the favorite hiding spots for spider mite eggs. Use a toothbrush dipped in alcohol or bleach to scrub the teeth of the zippers and the folds of the fabric.
- Reflective Surfaces: Wipe down the interior of your tent. If you notice the silver lining is dulling, a gentle cleaning can actually improve your light reflection, effectively giving your plants more energy.
Phase 4: Sterilizing Hydroponic Systems
Hydroponic setups, specifically bucket systems, require the most technical attention because biofilm can hide inside the tubing. Biofilm is a slimy layer of bacteria that protects pathogens from surface-level cleaning.
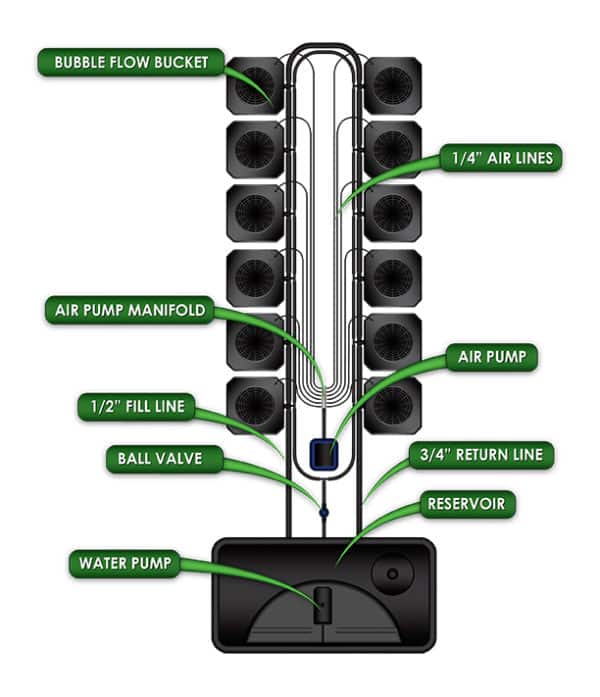
- The System Flush: Reassemble your system (without plants) and fill the reservoir with water and a high concentration of H2O2 or a specialized line cleaner. Run the pumps for 24 hours. This ensures the cleaning agent reaches every elbow, T-joint, and emitter.
- The Scrub: After the flush, disassemble the lines. If you see brown or green slime, you need to use a tube brush to physically remove it.
- Reservoir Deep Clean: Scrub the walls of the reservoir. Use a mineral descaler if you see a white "ring" around the water line.
- Air Stones: Air stones are porous and almost impossible to fully sterilize once they’ve been clogged with biofilm. It is often safer and more cost-effective to simply replace them between every cycle.
Phase 5: Lights, Fans, and Ventilation
Your LED lights and fans are the "lungs" and "sun" of your operation. If they are covered in dust, they run hotter and less efficiently.
- Fans: Take apart your oscillating fans and wipe down the blades. Dust buildup on the blades causes imbalance, which leads to motor failure.
- Carbon Filters: While you can’t "wash" a carbon filter, you should wash the pre-filter (the fabric sleeve) in the laundry. If your filter is over a year old, consider replacing it now to avoid odors during the next bloom phase.
- Light Fixtures: Use a dry microfiber cloth to remove dust from the diodes or bulbs. If there is grime on the glass or reflectors, use a small amount of isopropyl alcohol. Never spray cleaner directly onto a hot light fixture.

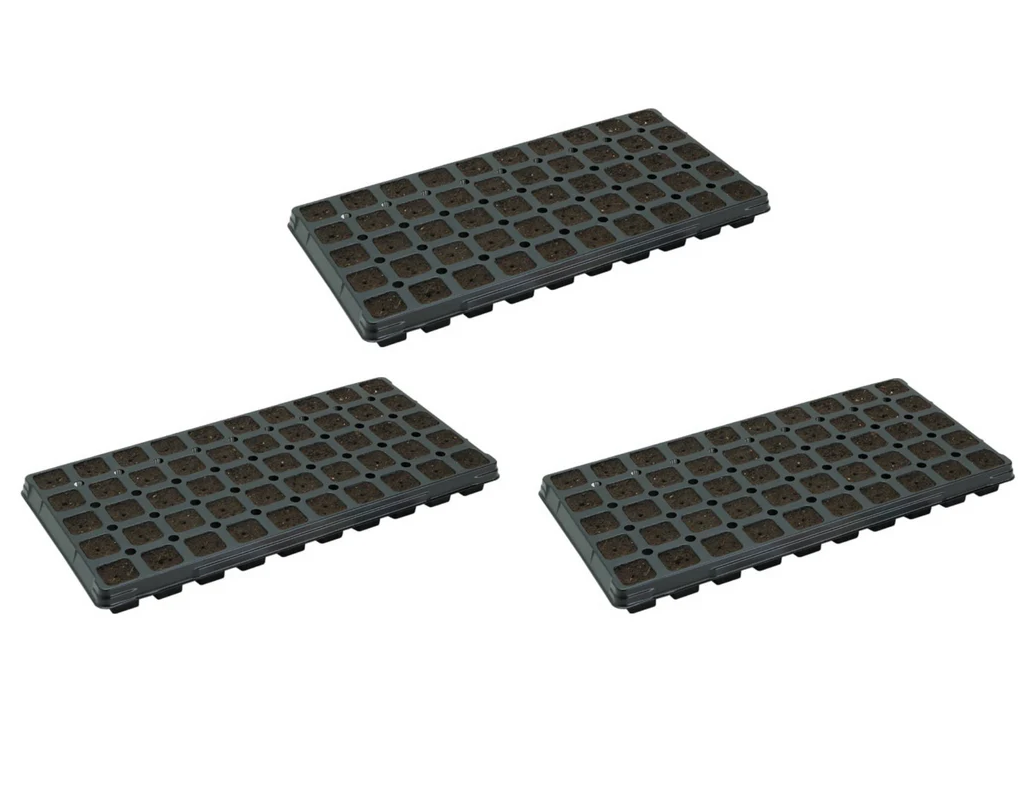
Phase 6: Propagation and Small Tools
Don't forget the equipment you use for the earliest stages of life. If your seed starting trays or cloning systems are contaminated, your plants will be sick before they even hit the main grow room.
- Cloning Machines: Aeroponic cloners are notorious for harboring pathogens in the manifold. Run a heavy bleach solution through these, then rinse multiple times.
- Snips and Scissors: Soak your trimming and pruning tools in alcohol.
- Pots and Trays: If you reuse plastic pots, soak them in a tub of bleach water for 30 minutes, then scrub them to remove any salt crust or root fragments.

The Final Reset: Testing the Environment
Once everything is scrubbed, rinsed, and dried, it’s time for the "blank" test. Turn on your fans and lights and let the room run for 24 hours. Check your temperature and humidity. Sometimes, after a deep clean, you might realize a piece of equipment isn't performing correctly, or a seal on your tent has been compromised.
This is also the perfect time to review your nutrient strategy for the upcoming run. If you had issues with salt buildup, consider checking out our plant nutrients packages to find a cleaner-running formula.
Summary Checklist for a Sterile Start
- Empty the Room: No organic matter or leftover media.
- Vacuum: HEPA vacuum for dust and eggs.
- Chemical Wash: Top-down scrub with H2O2 or 1:10 Bleach.
- System Flush: 24-hour circulation of cleaning agent through all lines.
- Filter Maintenance: Wash pre-filters; check carbon bed integrity.
- Tool Sterilization: Soak all snips, trays, and domes.
- Safety Check: Ensure all electrical connections are dry and secure.
The effort you put into sterilization now will save you weeks of headaches later. There is nothing more frustrating than being six weeks into flower and realizing you have a root rot issue that could have been prevented with a simple $20 bottle of peroxide and a few hours of elbow grease.
If you have questions about which cleaning agents are safe for your specific setup, or if you need help troubleshooting a persistent pest issue, don't hesitate to check out our grow help videos or reach out to us directly. We are here to help you grow your best, every single cycle.